Primer-BLAST step by step
Primer-BLAST is NCBI's free tool that designs primers while checking them against the whole genome or transcriptome for off-target amplification. You can also enter existing primers just to check specificity. The page looks long, but only a few fields usually need changing.
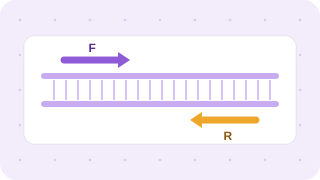
Design or check primers in the WetLab Kit primer tool, then press "Check with Primer-BLAST" to open NCBI with the primers and organism already filled in.
Open primer design & check →1. PCR Template
- Enter the gene's RefSeq accession (e.g. starting with NM_) if possible — only then can exon boundaries be used.
- A pasted FASTA sequence works, but exon-junction features are limited.
- To restrict primers to a region, fill in the Range From/To positions.
- To only check existing primers, leave the template empty and enter the two primers under Primer Parameters.
2. Primer Parameters — size and Tm
| Field | qPCR | Standard PCR |
|---|---|---|
| PCR product size | 70 – 200 | 300 – 1000 (as needed) |
| Primer melting temperatures (Min/Opt/Max) | 58 / 60 / 62 | 57 / 60 / 63 |
| Max Tm difference | 2–3 | 3 |
Entering primers in "Use my own forward/reverse primer" checks just those primers, or finds a partner if you enter only one.
3. Exon/intron selection — the key for qPCR
- Exon junction span: choosing "Primer must span an exon-exon junction" places one primer across an exon junction. It cannot bind genomic DNA, so incomplete DNase treatment is less of a problem.
- Intron inclusion: "Primer pair must be separated by at least one intron" puts the primers in different exons, so a genomic product would be much larger and distinguishable.
Both require a RefSeq accession as the template. For single-exon genes, rely on a no-RT control instead.
4. Specificity checking — what to compare against
- Database: "Refseq mRNA" for qPCR on cDNA; "Refseq representative genomes" or "Genomes for selected organisms" for genomic PCR.
- Organism: always enter the species you work with (e.g. Homo sapiens, Mus musculus). Leaving it empty compares against everything — slow and cluttered.
- Leave the other specificity settings (allowed mismatches, etc.) at their defaults.
Finally press Get Primers; results appear after a minute or so.
5. Reading the results
- Each primer pair lists sequence, Tm, GC and self-complementarity, plus "Products on target templates" (products from your gene).
- "Products on potentially unintended templates" means other genes may also amplify. It is riskier when the product size is similar and the mismatches are not near the 3′ end.
- Products only on several transcript variants of the same gene are usually fine — often you want primers that measure all variants.
- Lower self-complementarity and self 3′-complementarity scores are better.
6. Common mistakes
- No organism entered, so the results never end
- qPCR with the default product size (up to 1000 bp)
- Entering the reverse primer in template orientation — both must be written 5′→3′
- Trusting Primer-BLAST alone — efficiency, melt curve and product size on a gel still need checking at the bench
Design or check primers in the WetLab Kit primer tool, then press "Check with Primer-BLAST" to open NCBI with the primers and organism already filled in.
Open primer design & check →